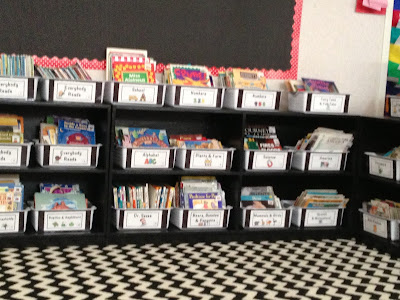
Organizing the classroom library can be an overwhelming task. Especially if you don't have a system already in place or you decide you need a system halfway through your organizing process. Organizing your classroom library can be a bit of an investment too.
Before you Begin...
First, decide on how you want to sort your books. Do you want them by author, themes or reading levels? I personally have a little of each in my classroom library. Next decide on what you will keep your books in for easy movement from a shelf to the floor or tables. I use white Sterelite baskets. It was an investment, but they will last. These are the baskets I use.
Amazon has them in packs of 6- for $15.58 that's a good deal. They are $4.99 each at Target.
The following section contains affiliate links, which means if you click on one of the product links, to purchase the product or any other products from this website, I'll receive a commission.
Dollar Store for dishpans or buckets
Ice Cube Buckets
Clear Shoe Boxes
Walmart Dishpans- They come in red, white or black
Book Box Labels
Once you decide on how to organize your books, you will want to make some sort of label to place on the front of each box. You can get my labels here. Before you start making and printing your labels, play with the size of label you will be using and how you will be attaching it. There are several ways to attach labels and I have tried them all.
Hot Glue
Velcro
Packing Tape
Clear Contact Paper
Before you attach the labels you may want to laminate them for durability. They will take some abuse, especially if the boxes are being moved frequently from the shelves.
Label Your Books Inside and OutHot Glue
Velcro
Packing Tape
Clear Contact Paper
Before you attach the labels you may want to laminate them for durability. They will take some abuse, especially if the boxes are being moved frequently from the shelves.
Label your books. Invest in a stamp mine reads- This book belongs to Mrs. Mugurussa or use address labels or make your own labels on the computer. Place inside the front cover of each book.
For the outside of your books, decide how students will know where to return the book to when they are finished. I use a number system. Each box is assigned a number and every book in that box has a sticker on the upper right corner with the same number. You could also place the number inside the front cover of the book too, just incase the sticker falls off. In my classroom library all of my book labels match my box labels. Another idea to help students know where to return the books to, would be to use alphabet letters instead of numbers. This works if you have no more then 26 boxes. For the book labels you can use round sticky dots and a Sharpie or print out computer labels.
You Can Do It!!!
With the right organizational supplies and some time, organizing the class library can be accomplished. Go slow, don't expect to be done in a few hours. Go through the books to see what types of books you have. As you browse, you will get an idea as to how you will want to group them. Once you decide how to group them, start sorting in 5 easy steps
- If space is a concern know how many containers you will need- buy a few extra- just in case you need more. You can always return them or keep them just in case you need them later on as you acquire more books
- Make your labels for the front of the books (either numbers or letters).
- Sort your books.
- Add the labels.
- Make your book box labels and attach.
These are my labels- nothing fancy I made them back in 2012. They are printed on 5x7 card stock then backed onto the black paper before I laminated. I then hot glued them to the baskets. You can download my labels for free here.
This picture is from the end of the school year- a few of the labels have come loose, but a little more hot glue and hey will be good as new.


No comments
Post a Comment